The Prep Work a Pro Decorator Does That Most DIYers Skip
There’s a unique satisfaction that comes with stepping back to admire a freshly painted room. The colour is perfect, the air smells clean, and the space feels brand new. It’s a transformation that many Warrington homeowners bravely tackle themselves over a bank holiday weekend. You buy the brushes, select a trendy paint colour from B&Q, and get to work. But a few months later, the illusion can shatter. You notice a bit of peeling paint near the window, a hairline crack reappearing on the chimney breast, and those cutting-in lines around the sockets don't look quite as sharp as you first thought. The difference between a good-for-now DIY job and a stunning, long-lasting professional finish lies almost entirely in the unseen hours spent before a single drop of colour touches the walls. This is the prep work a pro decorator does that most DIYers skip, and it’s the secret ingredient to a flawless result.
It’s often said that professional decorating is 80% preparation and 20% application. For the average DIYer, those numbers are often reversed. We get excited about the final colour and rush the crucial foundational steps. A professional understands that paint is not a miracle cure; it’s a delicate finish that will only ever be as good as the surface it’s applied to. In this guide, we’ll pull back the curtain on the meticulous preparation that Warrington’s best decorators undertake to ensure every project is perfect, durable, and worth every penny.
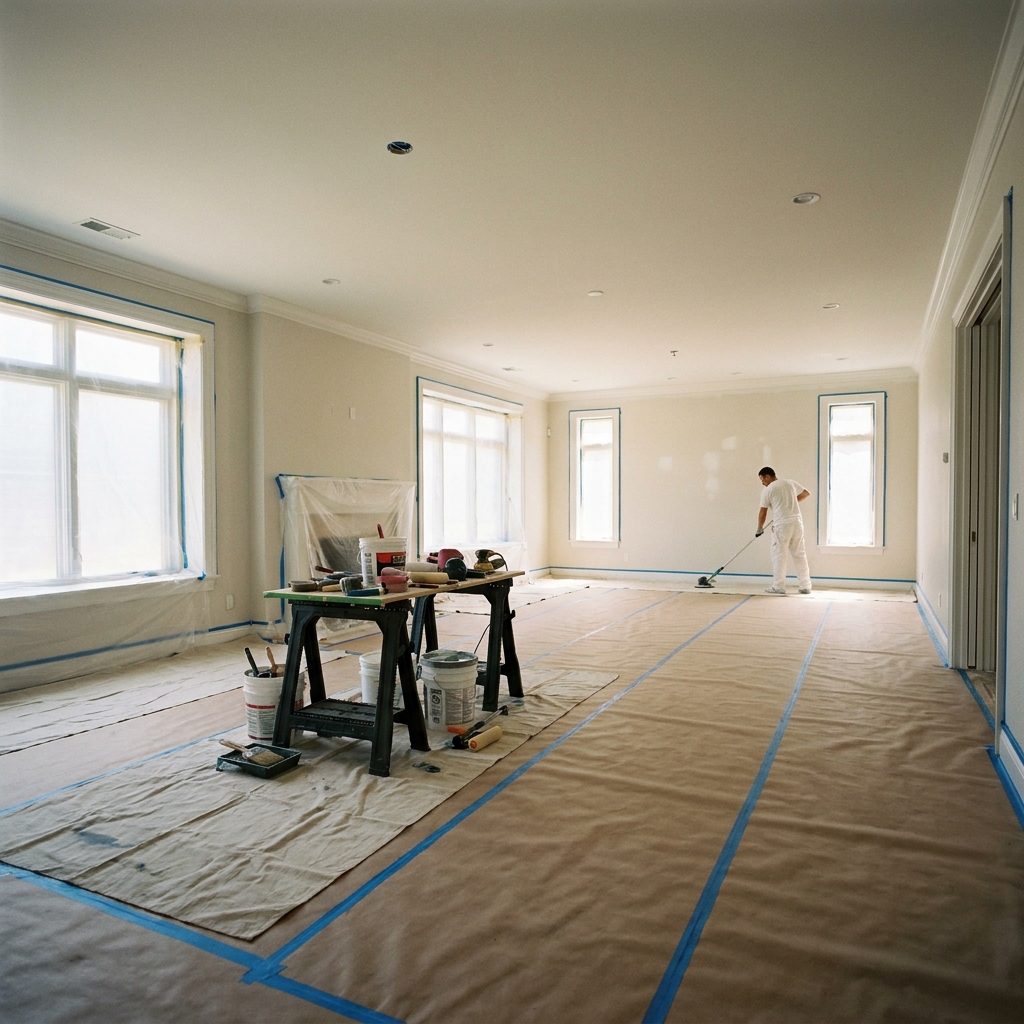
Beyond the Dust Sheet: The Meticulous Room Assessment
For most of us, preparing a room means moving furniture to the centre and covering everything with dust sheets. For a professional, that’s just the very first, most basic step. The real work begins with a forensic-level assessment of every single surface to be painted.
A Decorator's Eye for Detail
A seasoned decorator doesn't just see four walls and a ceiling; they see a story of the house's history. They will run their hands over surfaces to feel for imperfections the eye might miss. They’ll use a bright torch, held at a sharp angle to the wall, to reveal every minor bump, dip, and crack. This initial inspection is designed to identify potential problems that could sabotage the final finish:
- Damp and Mould: Are there tide marks from a past leak? Is there black spot mould in the corners? Simply painting over these issues is a cardinal sin. A pro will insist on identifying and fixing the root cause first, whether it’s a ventilation issue or a slow leak from a pipe.
- Previous Paint Jobs: Was the last job done poorly? A pro will spot peeling, flaking, or crazed paint, which indicates the previous layer didn't adhere properly. They’ll also check what kind of paint was used. Applying a water-based emulsion over a glossy, oil-based paint without proper priming is a recipe for disaster.
- Surface Integrity: This is especially important in the varied housing stock we see across Warrington. In an older Victorian terrace in Latchford, a decorator will be looking for crumbling lath and plaster or cracks that suggest movement. In a modern new-build in Chapelford, they might be checking for popped plasterboard joints. Any structural issues need addressing before a single pot of paint is opened. If the problems are significant, they might recommend you first hire a specialist. For extensive cracking or damaged walls, it's always best to consult a Warrington plastering professional to ensure the surface is sound.
This diagnostic stage is non-negotiable for a professional. It allows them to accurately quote for the job, select the right materials, and guarantee the longevity of their work. Skipping it is like building a house on shaky foundations.
The Art of Surface Preparation: Cleaning, Filling, and Sanding
Once the room has been assessed, the physical work of creating the perfect canvas begins. This is the stage that is most often rushed by enthusiastic DIYers, but it’s where the magic truly happens.
Step 1: The Deep Clean
You wouldn't paint a dirty car, so why would you paint a dirty wall? Over the years, walls accumulate a thin film of dust, grease, cobwebs, and residues (especially in kitchens from cooking, or rooms where people smoke). Paint cannot form a strong bond with a contaminated surface.
The DIY Approach: A quick wipe with a damp cloth, if anything at all.
The Professional Approach: A thorough wash-down with a sugar soap solution or a specialist degreasing agent like TSP (Trisodium Phosphate) substitute. This powerful cleaner cuts through grime and creates a slightly keyed, chemically clean surface that is perfect for paint adhesion. The walls are then rinsed with clean water and allowed to dry completely.
Step 2: Filling and Repairing
Every wall has imperfections. Nail holes, screw pops, dings from furniture, and hairline cracks are all part of a home's life. How these are treated makes a huge difference.
The DIY Approach: Squeezing a bit of all-purpose filler into the most obvious holes, leaving a raised lump that’s tricky to sand flat.
The Professional Approach: A pro will have an arsenal of fillers for different jobs. A fine surface filler for small cracks, a flexible decorator's caulk for gaps between trim and walls, a two-part wood filler for damaged skirting boards. They apply the filler in thin layers, allowing each to dry, and slightly overfill the area. This is crucial for the next step.
Step 3: Sanding for a Glass-Smooth Finish
Sanding is arguably the most important—and most tedious—part of preparation. It’s also the dustiest, which is why many DIYers avoid it. But its purpose is twofold: to flatten filled areas and to 'key' the entire surface.
The DIY Approach: A quick rub over filled patches with a scrap of sandpaper.
The Professional Approach: A pro sands everything. Filled areas are sanded back with progressively finer grits of paper until they are completely undetectable by sight or touch. Then, all remaining wall and woodwork surfaces are lightly sanded. This isn't about removing the old paint, but about creating a microscopic rough texture that gives the new primer and paint something to grip onto. Many professionals now use dust-extraction sanding systems, which connect to a vacuum, minimising airborne dust and creating a cleaner, healthier working environment for everyone in the home.
Priming and Sealing: The Unseen Foundation of a Perfect Finish
With the surfaces clean, smooth, and sound, you might think it's finally time to get the colour on. Not so fast. The next critical step is priming. Primer is one of the most misunderstood products by DIYers, who often see it as an unnecessary expense or are tempted by 'paint and primer in one' products.
A professional knows that primer isn't just 'undercoat'. It's a specialist problem-solver that performs several vital functions:
- Sealing Porous Surfaces: New plaster and filler are incredibly thirsty. Without a primer (or a 'mist coat' of watered-down emulsion on new plaster), they will suck the moisture out of your expensive topcoat, causing it to dry too quickly and patchily.
- Blocking Stains: Have a stubborn water stain from a historic leak? Or perhaps a child’s creative crayon masterpiece? A standard emulsion won't cover these. The stain will simply bleed through as the paint dries. A pro will use a specific stain-blocking primer (often shellac-based or oil-based) to permanently seal the stain away.
- Promoting Adhesion: Painting over a glossy, shiny surface? Or transitioning from an old oil-based paint to a modern water-based one? You need an adhesion-promoting primer to act as a 'glue' between the old and new layers. Without it, the new paint could be scratched off with a fingernail.
- Ensuring Colour Uniformity: When making a dramatic colour change (e.g., from a dark red to a light beige), a tinted primer helps to obliterate the old colour, meaning you'll need fewer, more uniform topcoats to achieve the true new shade. This can actually save you money on expensive paint.
Skipping the correct priming stage is a false economy. It may save a few hours on the day, but it will almost certainly lead to a poor-quality finish that fails prematurely.
Masking Mastery: The Secret to Razor-Sharp Edges
Nothing screams 'DIY job' more than wobbly paint lines and splatters on sockets and light fittings. Achieving those satisfyingly crisp, clean lines is an art form that separates the amateurs from the pros.
The DIY Approach: Using cheap, cream-coloured masking tape that allows paint to bleed underneath, or attempting to cut in freehand without a steady hand or years of practice.
The Professional Approach: Pros invest in high-quality, low-tack painter's tape (brands like FrogTape or Tesa are popular). They apply it meticulously, using a filling knife or a credit card to press down the edge and create a perfect seal. For the ultimate sharp line, some will even run a tiny bead of decorator's caulk along the tape's edge, wipe it clean, and paint over it. This creates an impenetrable barrier to paint bleed.
Hardware and Fittings
A decorator’s attention to detail extends to all fixtures and fittings. While a DIYer might try to paint around a light switch, a professional knows this is inefficient and looks messy. They will isolate the power and remove faceplates from sockets and switches for a much cleaner result. They'll also remove or meticulously mask door handles, window latches, and light fixtures. Important Note: While removing a simple faceplate is straightforward, for anything more complex or if you're unsure about electrics, it is always safest to consult one of the verified electricians in Warrington.
The Final Touches Before the First Coat
Just when you think there can’t possibly be any more prep to do, a professional performs a few final rituals to guarantee perfection.
- Caulking Gaps: A pro will inspect every internal corner, every join between skirting boards and walls, and around every door frame. They will fill any tiny gaps with a thin, smooth bead of flexible decorator's caulk. This simple step creates a seamless, high-end look that makes a huge visual impact. Paint alone cannot fill these gaps.
- The Final Clean: All that sanding creates a fine layer of dust that settles everywhere. Just before priming, a pro will vacuum the entire room again, including the walls, and then wipe every surface down with a tack cloth or a slightly damp microfibre cloth to remove any final lingering dust particles. Painting over dust results in a gritty, rough finish.
- Planning the Attack: A pro doesn't just start randomly. They have a methodical plan for painting the room, typically starting with the ceiling, then the walls, then the woodwork (skirting, frames, doors), and finally any feature elements. This order is designed to manage drips and ensure the sharpest lines between different surfaces and colours.
Is It Worth Hiring a Professional?
When you look at the sheer amount of work involved in professional-level preparation, it’s easy to see where the value lies. You are not just paying for someone to apply paint to a wall; you are paying for their experience, their meticulous attention to detail, their knowledge of materials, and the hours of laborious, dusty, and technical work that creates a durable, flawless canvas.
For many Warrington homeowners, the time, skill, and tools required for this level of prep are simply out of reach. By hiring a professional, you are investing in a finish that won't just look good next week, but for years to come. The smooth walls, crisp lines, and durable finish are a direct result of the painstaking preparation that most of us would rather skip.
So, the next time you’re planning to redecorate, consider the hidden work that goes into a truly professional job. If the thought of all that sanding, filling, and priming feels overwhelming, it might be time to call in an expert. If you're ready to transform your home with a finish that lasts, find your perfect local tradesperson on our list of vetted painters and decorators in Warrington.
Enjoyed this article?
Need a Verified Tradesperson in Warrington?
Browse verified local professionals across Warrington & Cheshire. Compare reviews, check qualifications, and get free quotes.